
Open the folder you already use
Existing repositories stay in place. Initializing a new repository adds Git metadata to the selected folder; you do not need to import documents into a separate library.
- Install Git on your computer if it is not already available, and make sure your Git author identity is configured for commits.
- Choose File → Open folder and select your project folder, then open Tools → Git version control.
- Check the displayed branch and file status. If the folder is not yet a repository and you want to track it, choose Initialize Git in this folder.
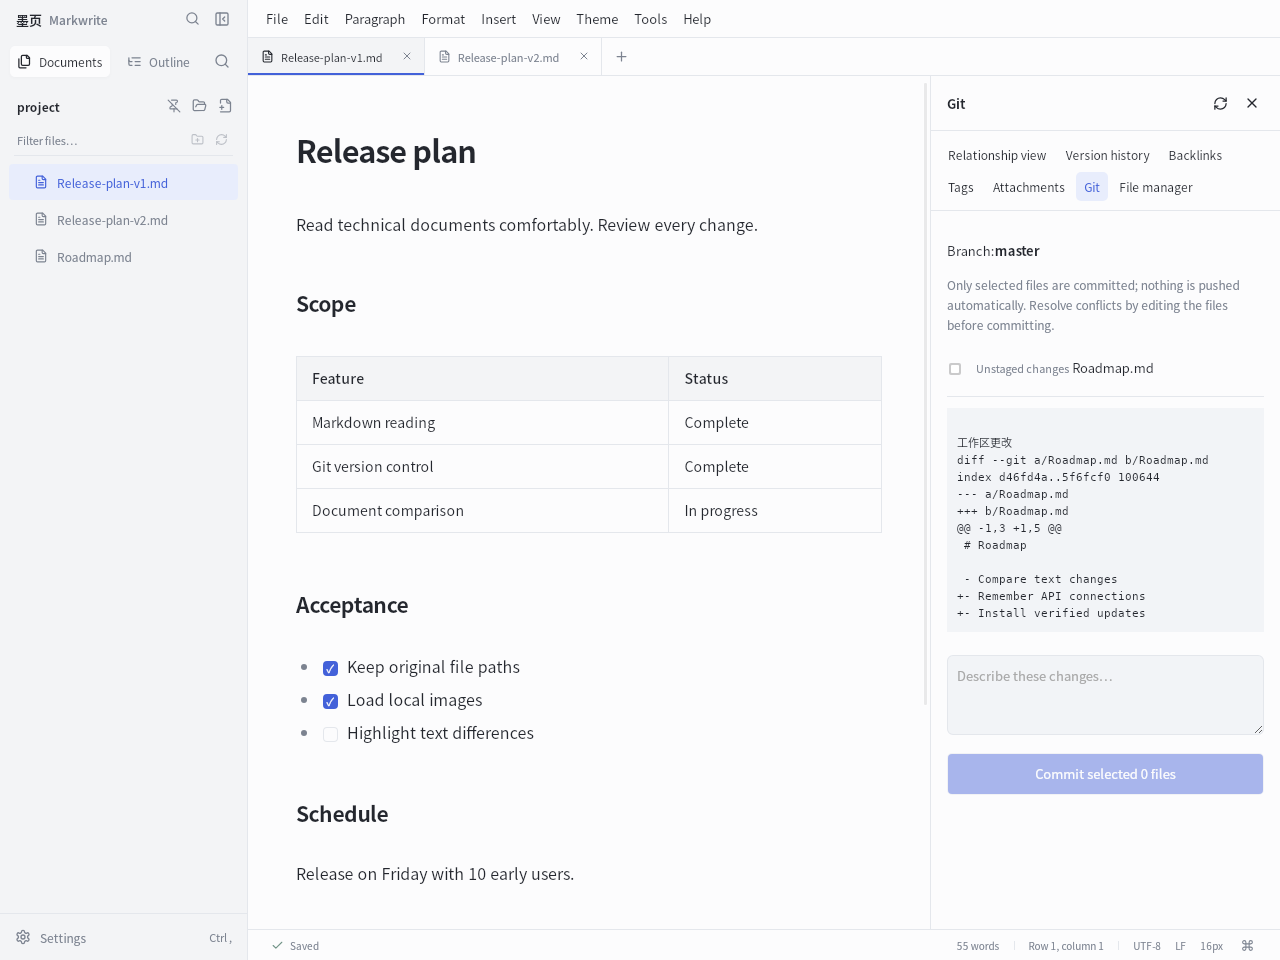
Review saved changes and commit selected files
For an ordinary commit, only explicitly selected files are included. Keep unrelated document changes out of the selection so the history explains one change at a time.
- Save the document changes you want Git to record. Git works with files on disk; unsaved editor text is not a commit.
- Click a changed file in the Git panel to inspect its diff. Review both working-tree and staged changes when they are present.
- Select the files that belong in this change and enter a useful commit message, such as “Clarify installation steps”.
- Click Commit selected files. Markwrite reports the identifier of the created local commit.
Resolve a merge conflict with three versions
A merge commit includes all staged files. Inspect that complete set before finishing. Marking a file resolved stages its current disk contents, so saving the intended result comes first.
- When the repository has a conflicted file, click Three-way comparison next to it. Review Base, Ours and Theirs.
- For each conflict, choose Use ours, Use theirs or Use both. Use base is available for a block when its conflict data includes the base. You can also edit the final result.
- Click Save resolution, review the saved result, then click Mark resolved in the Git panel.
- Once all conflicts are resolved, choose Select all staged files, enter a message and click Complete merge commit.
Keep local history and remote synchronization separate
This workflow creates local commits and does not automatically push to GitHub or another remote. Use your preferred Git tools for fetching, pulling and pushing.
Conflict resolution refuses to overwrite a file when the expected disk or index version has changed. Resolve unsaved edits or disk conflicts in an open document before saving a merge result.
Large Git diffs can exceed the application preview limit and require a system Git tool. Binary files do not have a text preview. Git history also does not replace a separate backup.